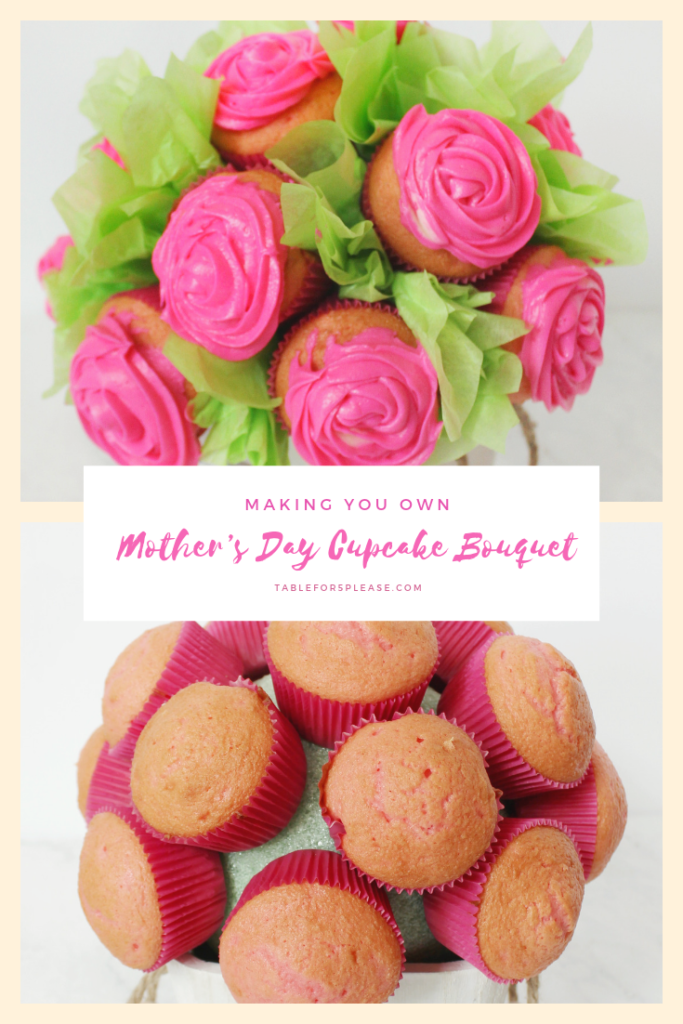
Ready for a fun twist on a traditional bouquet? This one you can EAT! This would be cute to take to a luncheon or any celebration, but this seemed perfect for Mother’s Day coming up.
Supplies
To start here is a list of the supplies you will need:
- pot or container
- styrofoam ball that wedges nicely into your pot
- wooden skewers
- green tissue paper
- hot glue gun
- cupcake liners
- boxed cupcake mix (& any ingredients it calls for)
- icing tip (I used Wilton 1M) & bag
- food coloring to tint your icing
- icing (see recipe or use store bought)
Icing Recipe
Instructions
- To start, cook the cupcakes according to the cake mix instructions.
- While those are cooking, combine all icing ingredients in a bowl and mix well with a spoon.
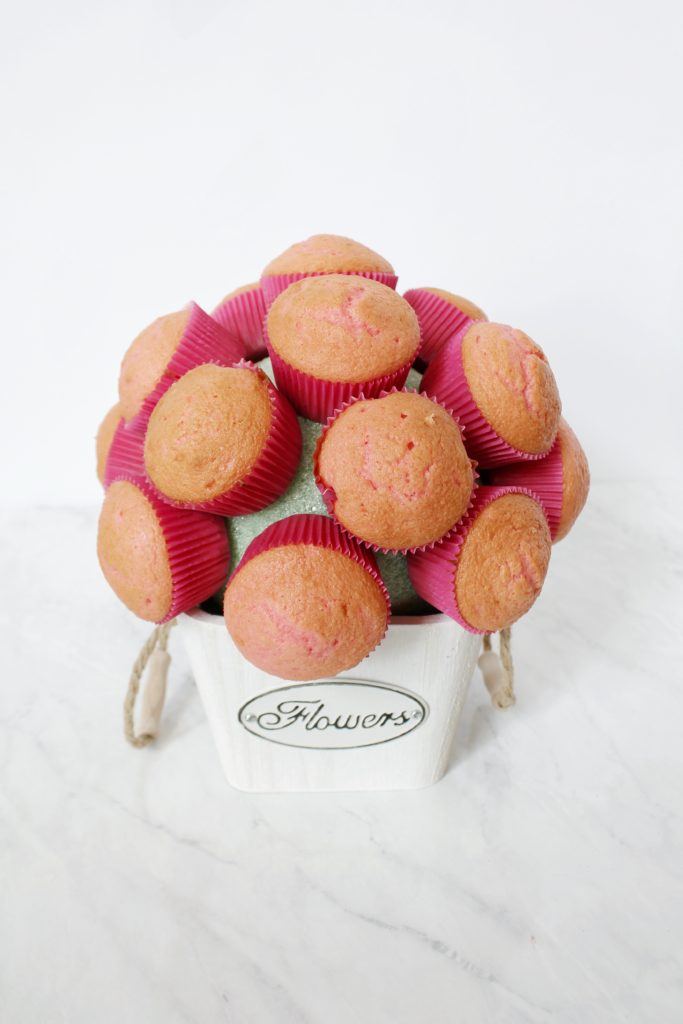
- Wedge styrofoam ball in pot. Break skewers in half (or smaller pieces) to use to stick cupcakes to ball. I broke mine in thirds and only had the pointy ends sticking out (makes it easier to slide cupcakes on).
- Once cupcakes are cool, use 2 skewer pieces to adhere one cupcake on. I put them side by side to help avoid the cupcake sliding off. Then I put my skewers on the first row and had to move them around a bit. You might just want to wait and do it one cupcake at a time.
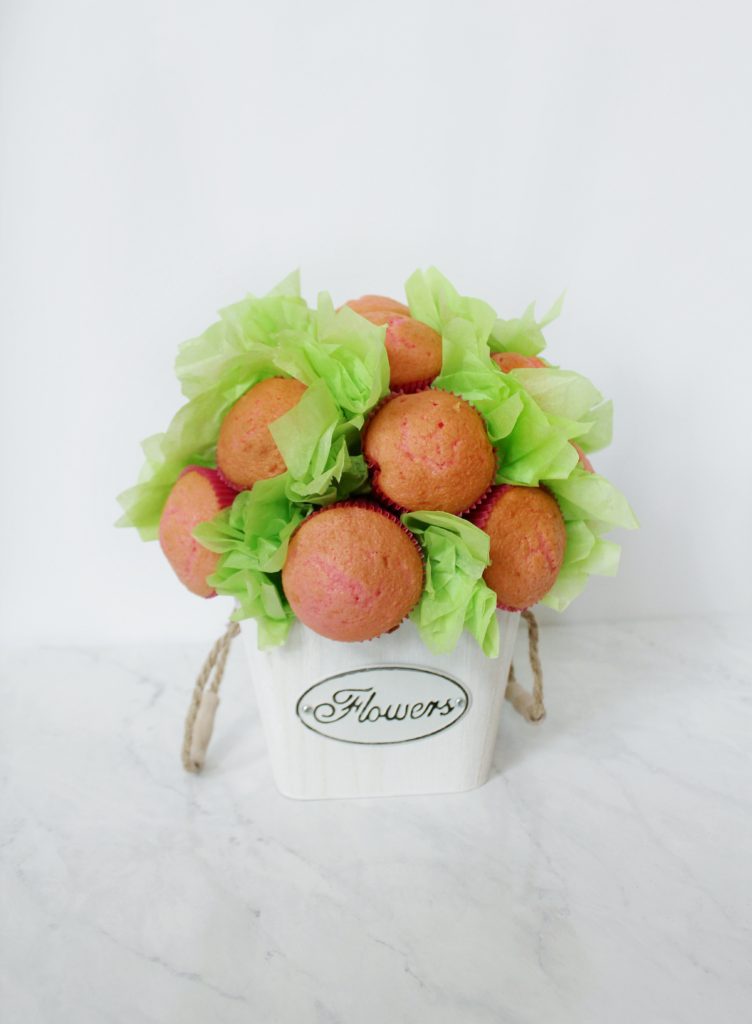
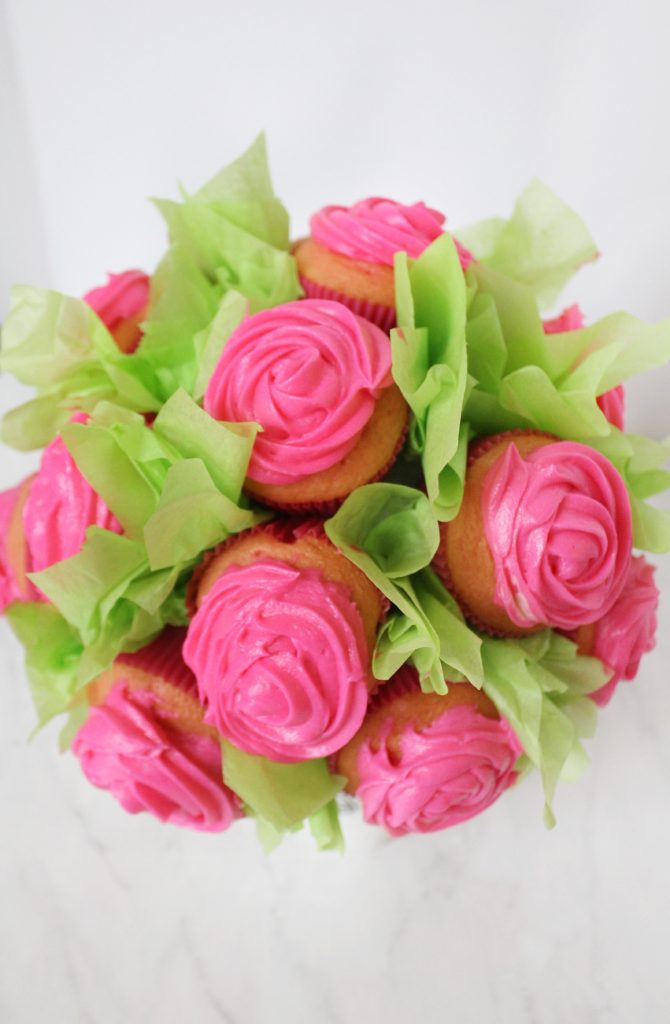
5. Next, arrange unfrosted cupcakes as you like. I put them fairly close together to avoid having to fill in big empty spaces. No matter what, you will have to fill in space with “leaves.”
6. As much as I wanted to slap the icing on right away, filling in the empty spaces with leaves has to be done next. You’d get icing all over you if you did the leaves after the cupcakes had been iced.
For the leaves, I cut a rough circle. Don’t cut a perfect circle, just a cicular-ish pattern. Take one piece of tissue and stick a pencil eraser in the middle. Then fold the tissue around the pencil, gluing the middle (use the eraser end to help push it onto the styrofoam ball) to the empty spaces. Fill in as needed.
7. Next up, icing these bad boys! I used the Wilton 1M tip with a piping bag and loved the look it gave the “flowers.” I started in the middle of each cupcake and spiraled outward going in a circular motion.
This was my first time making this so I think maybe I’d do it a bit differently. Up until this point, I’d do everything the same. From what I read, most people ice the cupcakes on the bouquet. This worked, but I found that bottom layer of cupcakes had gravity working against them and after a while the icing dripped off a little. So, I would go ahead and ice all the cupcakes except the bottom row. For those, I think I would take them off, ice them, let the icing harden a bit, then stick them back on. Sticking them back on shouldn’t be a big deal since you already have holes poked in the back from the skewers and the icing is more firm. Just be careful!
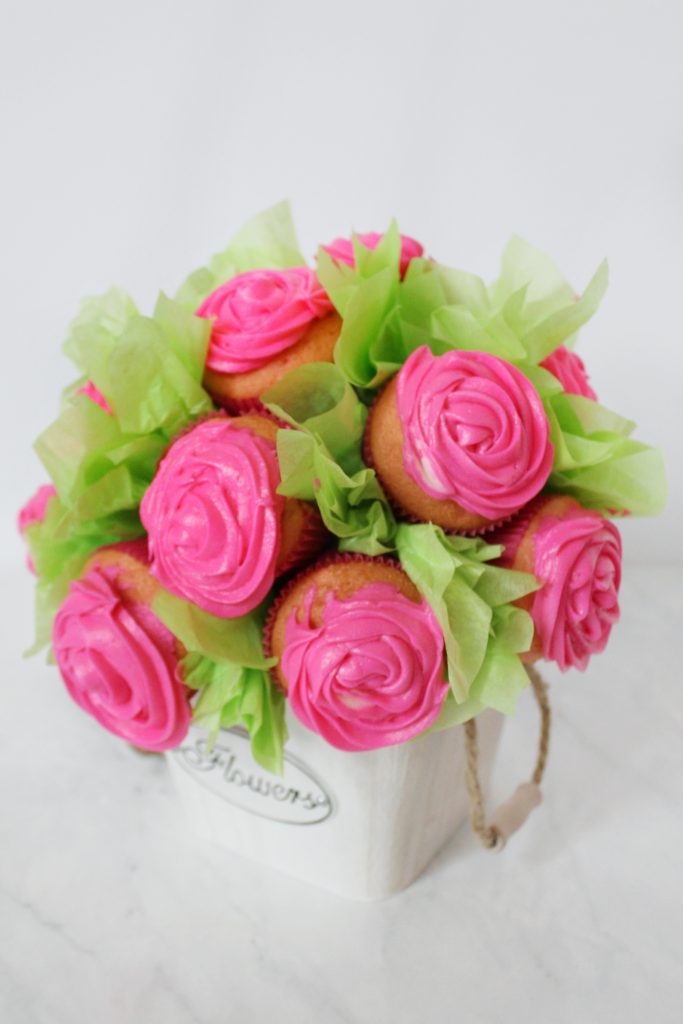
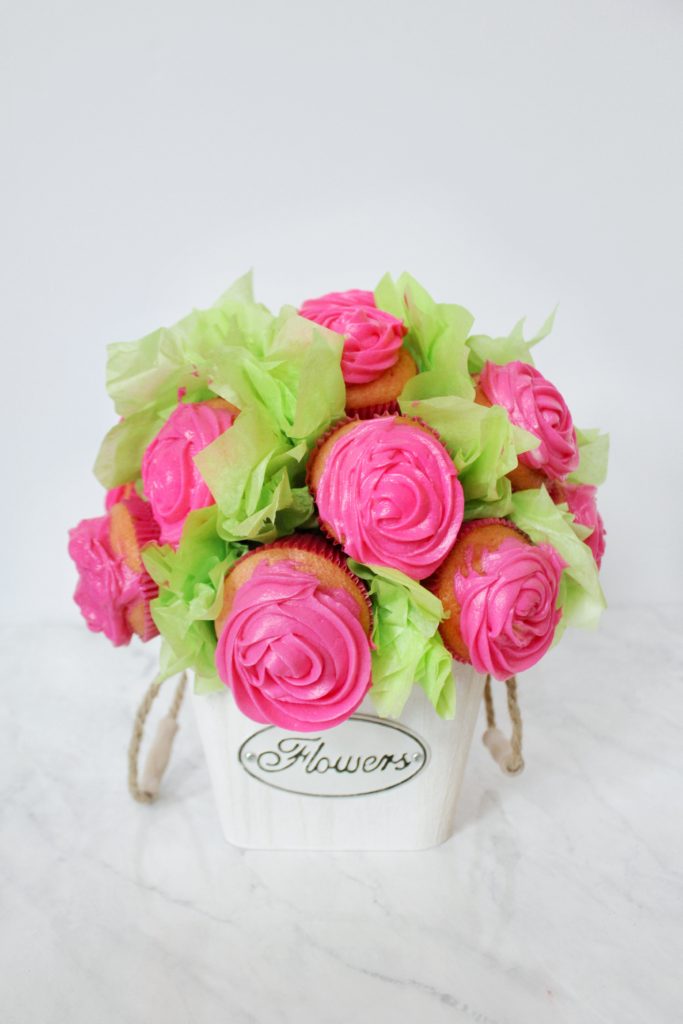
Enjoy your beautiful creation and give it to a lovely momma in your life!
Happy Mother’s Day!